You’ve selected the right CNSME vertical slurry pump for your application. The boxes have arrived, and the old pump is finally silent. Now comes the moment that separates a smooth decade of operation from a frustrating cycle of premature failures and unexpected downtime. Installation might seem straightforward—drop the pump into the pit, bolt it down, and turn the key. But vertical slurry pumps have specific needs that, when addressed during installation, pay dividends in reliability. Skip these steps, and you’ll be pulling that pump back out far sooner than you’d like. Let’s walk through the best practices that experienced maintenance teams follow to get the most life out of their CNSME vertical slurry pumps.
Preparing the Pit Floor and Inlet Area
Before the pump ever touches the mounting plate, take a hard look at the bottom of your pit or sump. The impeller intake typically sits somewhere between six inches and eighteen inches above the floor. That gap is your friend—it prevents sucking debris directly off the bottom. But the floor itself must be clean and reasonably flat. Any chunks of old concrete, fallen tools, or compacted sludge will get drawn toward the intake and either clog the pump or damage the impeller. More importantly, check for a feature called a false floor or anti-vortex baffle. For pits with high flow rates, installing a simple steel plate a few inches above the actual pit bottom creates a stilling zone that prevents vortices from reaching the impeller. This homemade approach works wonders. Also, ensure the pit floor slopes gently toward the pump intake. Dead zones where solids accumulate will eventually rot and release hydrogen sulfide or methane, which corrodes the shaft from the outside in.

Leveling the Mounting Plate for True Vertical Alignment
Here’s a mistake that happens more often than it should. The mounting plate gets bolted to an uneven pit rim or a warped steel support frame. The pump goes in, and the shaft ends up leaning slightly. That lean might be only a fraction of a degree, but over a twenty-foot shaft, the impeller can be off-center by an inch or more. The result is uneven wear on the volute liner, contact between the impeller and the casing, and eventually a seized pump. The fix is simple but non-negotiable. Use a machinist’s level or a digital inclinometer on the mounting plate in two perpendicular directions. Shim the low corners with stainless steel shims until the plate reads level within 0.5 degrees. For extra precision, check the shaft itself for plumb by hanging a plumb bob from the motor mounting flange. This fifteen-minute step saves months of uneven wear and keeps the pump running smoothly.
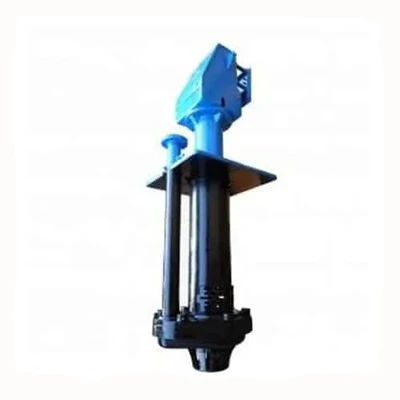
Setting Proper Impeller Clearance Before Startup
Unlike a horizontal pump where the impeller clearance is fixed at the factory, many CNSME vertical pumps allow you to adjust the impeller position relative to the volute liner. This adjustment is critical because the clearance directly affects both performance and wear. Too tight, and the impeller rubs, causing heat and premature failure. Too loose, and recirculation reduces efficiency while abrasive particles wedge into the gap, accelerating wear. The standard procedure involves loosening the adjusting nuts on the bearing housing, lifting or lowering the shaft assembly with a jacking screw, and measuring the gap with feeler gauges. For most slurry applications, a clearance of 0.020 to 0.040 inches works well. After tightening the nuts, rotate the shaft by hand. You should feel smooth resistance but no grinding. Document that clearance in your maintenance log. As the pump wears, you’ll gradually reduce the clearance to maintain performance.
Securing Suction and Discharge Piping Without Strain
The pump’s mounting plate is designed to support the weight of the pump and motor, not the weight of your discharge piping. Too often, installers bolt a heavy steel pipe directly to the pump’s discharge flange, and that pipe pulls the pump off-level or stresses the casing. The correct method is to support all piping independently within eighteen inches of the pump flange. Use a pipe hanger, a floor-mounted stand, or a wall bracket. Connect the pipe to the pump using a short spool piece with a flexible coupling or a rubber expansion joint. This flexible connector absorbs thermal expansion, vibration, and minor misalignment without transferring loads to the pump. For the suction side—if you’re using an intake pipe rather than an open sump—the same rule applies. No pipe weight should hang off the pump. When in doubt, remember: the pump’s job is to move fluid, not to hold up your piping system.
Wiring the Motor for Correct Rotation Direction
It sounds almost too simple to mention, but reversed rotation destroys vertical slurry pump faster than almost any other mistake. A CNSME pump running backward still moves fluid—just less of it—while the impeller tries to unscrew itself from the shaft. The result is a loose impeller that rattles against the casing, destroying both components within hours. Before you couple the motor to the shaft, or before you fill the sump, perform a quick rotation check. Bump the motor for a fraction of a second while watching the shaft end or the cooling fan. Compare the rotation to the arrow cast into the pump casing. For three-phase motors, swapping any two leads reverses direction. For single-phase motors, consult the wiring diagram. Do this test dry, with the pump empty. If you fill the sump first, you won’t be able to see the shaft, and you might discover the mistake only after the pump self-destructs. An ounce of prevention saves a five-figure repair.
Establishing a Flush Water Plan for the Seal Assembly
Even though CNSME vertical pumps place the seal above the slurry level, that seal still needs attention. The space between the shaft and the stuffing box or mechanical seal can accumulate dried slurry that migrates up the shaft during operation. A small, continuous flush of clean water—typically one to two gallons per minute—keeps this area clear. The flush water enters a port just below the seal, flows down the shaft sleeve, and exits into the sump. Never use untreated plant water that contains sand or debris; that defeats the purpose. For installations where clean water isn’t available, an air purge system creates a similar barrier without liquid. Whichever method you choose, install a flow meter or sight glass so operators can confirm the flush is running. A common failure mode is the flush line getting shut off by someone who didn’t understand its purpose. Label the valve clearly: “Do Not Close – Seal Cooling and Flushing.”
Performing the First Startup with Gradual Loading
You’ve checked everything. The alignment is true. The clearance is set. The piping is strain-free. Now resist the urge to flip the switch and walk away. The first startup deserves a careful, gradual approach. Start by filling the sump so the impeller is fully submerged. Then run the pump for thirty seconds without any discharge valve opening—just let it spin against a closed valve to fill the casing and purge any trapped air. After that, slowly crack the discharge valve open while listening for unusual noises. A healthy pump produces a steady, smooth hum. Clicking or rattling suggests solids are hitting the impeller or the clearance is too tight. Gravelly sounds often mean air is entering the intake. Run the pump at partial flow for fifteen minutes, then check the bearing housing temperature with your hand or an infrared thermometer. Warm is normal. Too hot to touch means a bearing problem or excessive clearance drag. Finally, open the valve fully and let the pump settle into its normal duty. Record the motor amps, discharge pressure, and bearing temperature in a startup log. That baseline will be invaluable six months from now when you’re troubleshooting a gradual performance drop.