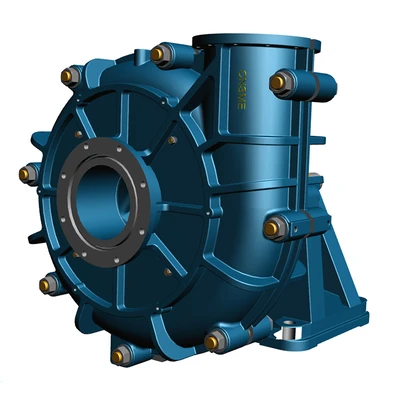
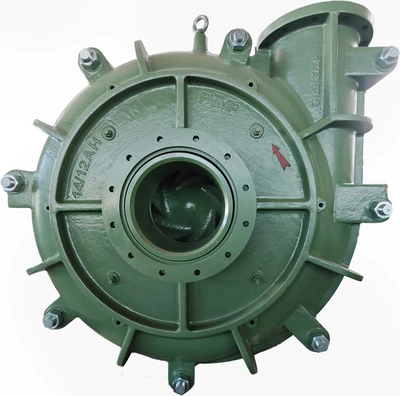
So you have finally made the smart decision and purchased a CNSME heavy duty slurry pump. The crate has arrived at your facility, and everyone is excited to get this beast into service. But hold on for just a moment. I have watched too many companies spend premium money on excellent pumps only to sabotage themselves with rushed, careless installation. The truth is that even the finest pump will fail prematurely if its foundation is shaky, its piping strains the casing, or its alignment drifts outside spec. Installing a heavy duty slurry pump is different from setting up a standard water pump. These machines are heavier, they generate more vibration during normal operation, and they demand more respect during the mounting process. Let me walk you through what actually matters when putting a CNSME pump into industrial service.
Preparing the Concrete Foundation Properly
The foundation is not just a place to set the pump. It is the anchor that keeps everything stable. CNSME heavy duty slurry pumps weigh significantly more than standard models, and they produce higher dynamic loads as slurry moves through the volute. A thin, poorly reinforced concrete slab will crack and settle over time, throwing your alignment off and introducing vibration that destroys bearings and seals. Your foundation needs to be at least twice the mass of the pump assembly, with rebar reinforcement and a minimum thickness of eight inches for most industrial applications. The concrete should cure for at least two weeks before you mount the pump baseplate. I have seen plants try to rush this step, pouring concrete on Friday and mounting the pump on Monday. Within six months, the baseplate was rocking on cracked concrete and the pump sounded like a jackhammer. Take the time to do the foundation right, because fixing it later means shutting down your entire process.
Getting the Baseplate Level Within Tight Tolerances
You might think that leveling a pump baseplate is simple. Just put a bubble level on the mounting pads and call it done. But CNSME pumps require precision that ordinary bubble levels cannot provide. The baseplate must be level within 0.001 inches per foot across both the length and width. That is incredibly flat. The reason for this tight tolerance is that any twist in the baseplate translates directly into bearing misalignment once you bolt down the pump and motor. A twisted baseplate forces the pump shaft and motor shaft into a permanent bind, creating heat, vibration, and premature bearing failure. Use precision machinist levels or laser alignment tools to check the baseplate before you ever set the pump on it. Shim the baseplate at the anchor bolt locations until it is perfectly flat, then grout under the baseplate to fill any voids. This step takes patience, but it pays back in years of trouble free operation.
Piping Connections That Do Not Stress the Casing
Here is a mistake that happens constantly. The installation team connects rigid piping to the pump suction and discharge flanges, but the pipe does not line up perfectly. Instead of fixing the pipe alignment, they force the bolts into place, effectively pulling the pump casing into a strained position. The casing might not crack immediately, but internal clearances shift, the shaft runs off center, and wear accelerates dramatically. CNSME pumps are rugged, but they are not designed to support the weight of your piping system or to compensate for misaligned pipe flanges. Always use flexible connectors or expansion joints on both the suction and discharge sides. These connectors absorb thermal expansion, pipe settlement, and minor misalignments without transferring stress to the pump casing. When you bolt the flanges, the bolts should slide in freely by hand. If you need a hammer or a pry bar to align the holes, your piping is wrong and you need to fix it before proceeding.
Suction Piping Rules That Prevent Cavitation
Suction piping is where most slurry pump performance problems begin. Standard pumps can tolerate some turbulence or an eccentric reducer, but CNSME heavy duty slurry pump need clean, even flow entering the impeller eye. Any elbows, valves, or reducers placed too close to the suction flange create swirling flow that causes cavitation, vibration, and premature wear. The golden rule is to have at least five pipe diameters of straight pipe between the suction flange and the first fitting. If you must use a reducer, use an eccentric reducer with the flat side on top to prevent air pockets. Never place a suction strainer or valve directly at the pump inlet unless absolutely necessary. And keep the suction pipe as short and direct as possible. Every foot of pipe adds friction loss, and every fitting adds turbulence. I have seen plants double their pump life simply by relocating a suction elbow from two diameters away to eight diameters away. That is free reliability just waiting to be claimed.
Shaft Alignment Using Modern Laser Tools
Old school alignment methods using dial indicators and straightedges worked fine for slow speed, low precision equipment. Your CNSME pump deserves better. Laser alignment tools have become affordable and easy to use, and they provide accuracy that manual methods cannot match. The goal is to align the pump shaft and motor shaft within 0.002 inches parallel offset and 0.001 inches per inch angular offset. That is about the thickness of a human hair. Such tight alignment ensures that the flexible coupling operates within its design range, transmitting torque efficiently without imposing bending loads on the bearings. Check alignment after the pump has been running at operating temperature for several hours. Thermal expansion can shift alignment significantly, especially on hot slurry applications. Document your final alignment readings and recheck them after the first week of operation, then monthly thereafter. Thermal growth and foundation settlement happen slowly, but they do happen, and catching drift early prevents bearing and seal failures.
Setting Proper Impeller Clearance Before Startup
One adjustment that many installers overlook is the front impeller clearance. CNSME pumps are designed with adjustable impellers, meaning you can set the gap between the impeller and the suction liner to optimize performance and wear. Too much clearance creates recirculation and reduces pump efficiency. Too little clearance risks rubbing contact, which generates heat and can seize the pump. The factory setting provides a starting point, but final adjustment should be made after the pump is installed and the piping is connected. Loosen the bearing housing adjusting bolts, rotate the impeller while gently pushing it toward the suction liner, then back it off by the manufacturer specified distance, typically around 0.020 to 0.040 inches. This adjustment compensates for any longitudinal thermal growth and ensures maximum efficiency from day one. Document the clearance setting in your maintenance log so future rebuilds have a reference point.
Flushing and Testing Before Full Production
You would not drive a new car off the lot without a test drive, so why would you put a new slurry pump into full production without testing it first? Before introducing abrasive slurry, flush the system with clean water for at least an hour. Check for leaks at every flange, seal, and drain port. Listen for unusual noises that might indicate cavitation or rubbing. Monitor bearing temperatures with an infrared thermometer or thermal camera. Normal bearing temperature should stabilize below one hundred sixty degrees Fahrenheit. Check vibration levels using a portable vibration meter and record baseline readings for future comparison. Only after the water test passes should you slowly introduce slurry, starting at reduced speed if possible and gradually increasing to full operating conditions. This careful commissioning process takes a few hours but catches installation errors before they become catastrophic failures. I have seen water testing reveal loose bolts, misaligned pipes, and even a shop rag left inside a casing. Much better to find these problems with water than with expensive, abrasive slurry circulating through your plant.